Installing Outlook Direct
 Other Related Topics...
Outlook Direct is installed from the Castelle FaxPress Plus CD-ROM.
Before beginning the setup:
|
■
|
make sure the FaxPress client is installed |
|
■
|
disable all anti-virus programs running on the workstation. |
|
■
|
remove Microsoft Outlook from your StartUp folder. (Start>Programs>StartUp) |
|
■
|
make sure MAPISP32 is not running (close all Windows programs and reboot the workstation if necessary) |
Follow these steps to add Outlook Direct to an existing FaxPress client:
|
1.
|
Log on with administrator or equivalent privileges. |
|
2.
|
Place the Castelle FaxPress Plus CD-ROM in your drive. The Castelle FaxPress Setup screen will launch automatically. If Autorun is disabled on your machine, and setup does not launch automatically, select Start>Run, then type CD-Drive-Letter:\AUTORUN.EXE and click OK. |
|
3.
|
In the Castelle FaxPress Setup screen, select Install Client. |
|
4.
|
In the FaxPress Setup screen, select the first button, which lists Add-on Products. |
|
5.
|
In the FaxPress Setup screen, click Next>. |
|
6.
|
In the first Select Components screen, select thebutton. |
|
8.
|
In the screen, select Next>. |
|
9.
|
Select Email Integration. A warning message appears, telling you which FaxPress servers are supported by the Gateways software. Click OK. A screen appears with a new set of components you can select. |
|
10.
|
Click the MS Outlook Clients Using Outlook Direct option. The installation proceeds, and when it is complete, a confirmation box appears. |

|
11.
|
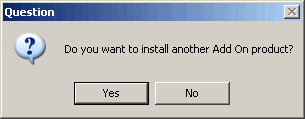
Click OK. A dialog box appears, asking if you want to install another Add On Product. |
|
12.
|
Click No. The Installation Complete screen appears. |
|
13.
|
Click Finish. Next, make sure you complete the next section, Adding the Castelle FaxPress Transport to the User Profile, before using Outlook Direct. |
Adding the FaxPress Transport to the User Profile
The Castelle FaxPress Transport, a service connecting the Outlook user to the FaxPress server, is part of the Outlook Direct installation. Adding the transport to the user’s mail profile allows the FaxPress to be used for sending and receiving faxes. The user must also have a FaxPress account.
To add the transport to the user’s mail profile, follow these steps.
|
1.
|
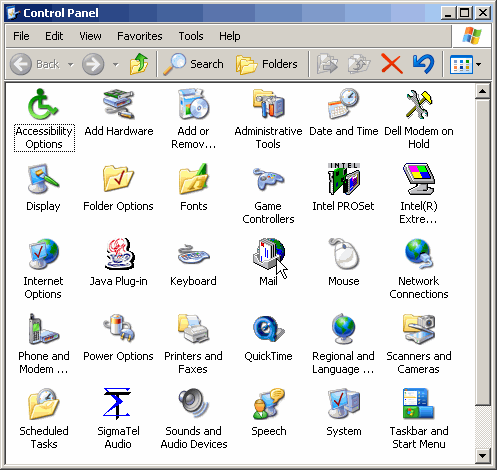
Open your Mail or Mail and Fax Control Panel. (My Computer>Control Panel>Mail) |
|
2.
|
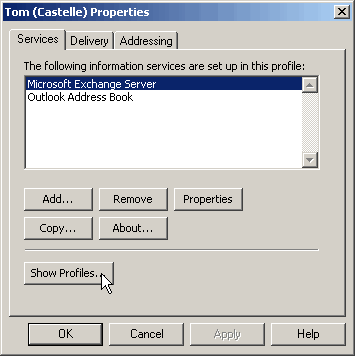
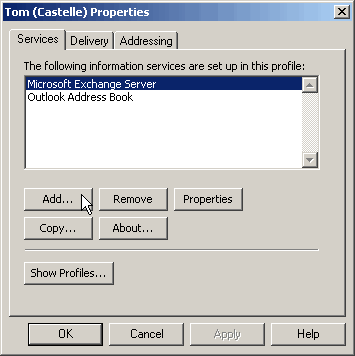
The MS Exchange Settings Properties window opens. Select the Services tab if it is not already selected. If you have more than one profile, and you intend to add the Outlook Direct transportation service to another profile, click Show Profiles. Otherwise, go to Step 4. |
|
3.
|
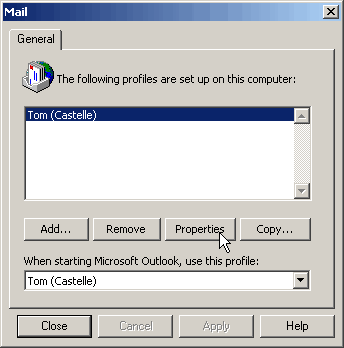
In the Mail or Mail and Fax window, choose the profile you’d like to edit, and click the Properties button. |
|
4.
|
In the default or secondary profile’s Properties window, with the Services tab selected, click Add. |
|
5.
|
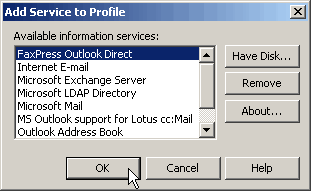
In the Add Service to Profile window, review the list of available services. |
|
6.
|
Select FaxPress Outlook Direct from the list of Available Information Services. Click OK to launch the FaxPress Transport Properties dialog box. |
If Microsoft Fax is listed, remove it to avoid potential conflicts that might occur after you configure the profile to use Outlook Direct.
|
7.
|
The FaxPress Transport Properties contains the configurable parameters for FaxPress Outlook Direct. This section covers the settings required for basic operation. See for a complete description of additional parameters. |
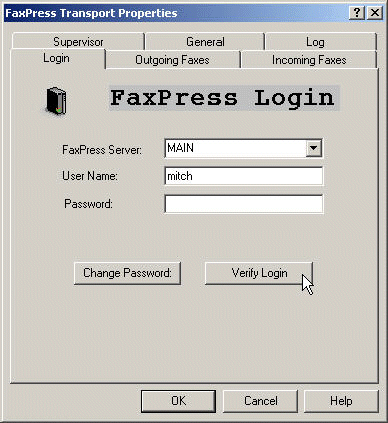
The Login tab allows you to configure the FaxPress account settings required to log into the FaxPress server. Select the FaxPress Server Name from the pull-down menu or, if you’re using the FaxPress client in TCP/IP mode, enter the IP address, enter your FaxPress User Name and Password, then click the Verify Login button.
|
8.
|
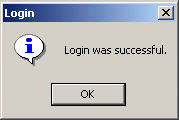
A Login Was Successful dialog box should appear, confirming that the information entered is correct, and matches an active FaxPress Server account. Click OK. |
|
9.
|
Select the General tab of the FaxPress Transport Properties screen. In the Enter your Exchange user name field, enter the Exchange user name, or, if you’re in a non-Exchange environment, type in your Outlook user name. |
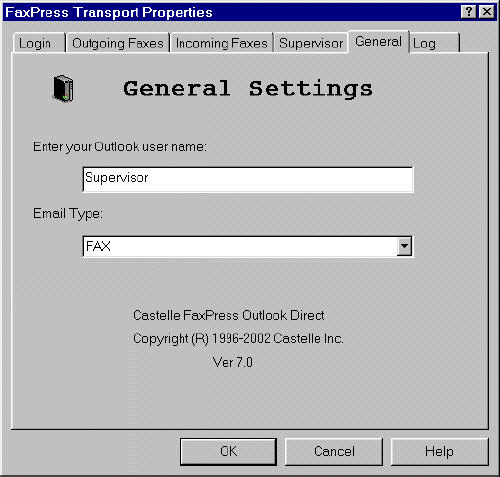
In the Email Type field, specify the type of e-mail service this is. The default value is FAX. Use FAX unless Microsoft Fax is installed in the user’s profile. Remove Microsoft Fax, or click on the arrow and choose FAXPRESS. The user cannot use the Fax Addresser (e.g. Business Fax entries in the Outlook Contacts list) when the e-mail type is FAXPRESS. Click OK. The Properties window returns to view.
|
10.
|
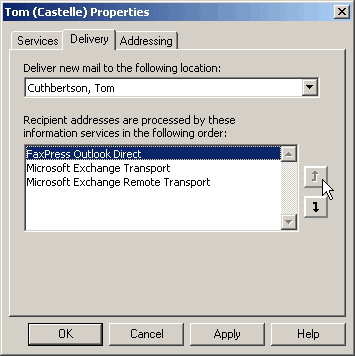
From the profile’s Properties dialog box, select the Delivery tab, select FaxPress Outlook Direct, then use the Up arrow to move FaxPress Outlook Direct to the top of the list. |
|
11.
|
If your network uses an external SMTP server (i.e., your ISP’s) rather than an Outlook server, the information service Internet email will also appear in the information services list. Select FaxPress Outlook Direct, then use the Up arrow to move FaxPress Outlook Direct to the top of the list, as shown. |
|
12.
|
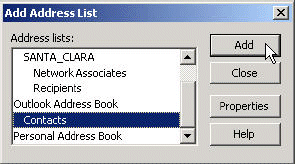
Select the Addressing tab, then click the Add. . . button.
|
|
13.
|
In the Add Address List, select Contacts, then click Add. Click Close to save and exit.
|
|
14.
|
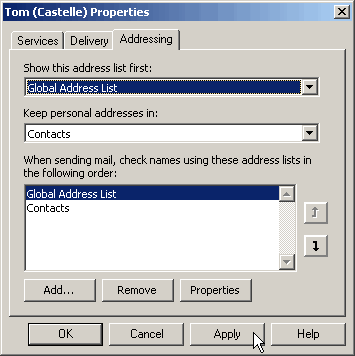
The Addressing tab will reflect the added Contacts phone book. Click Apply, then OK, then reboot the workstation. |
Registering Exchange Users on the FaxPress Server
This section applies only if you’re running an Exchange Server.
To use the FaxPress, Exchange users must have a FaxPress user account. The Import Microsoft Exchange Users tool allows the administrator to use the Outlook address book to create FaxPress accounts for Outlook users. To create new FaxPress accounts for Exchange users, follow the steps in this section.
Before beginning, make sure you have installed:
|
■
|
the FaxPress client for Administrators on the client workstation. |
|
■
|
the FaxPress Outlook Direct email gateway on the client workstation. |
|
■
|
the Outlook client on the workstation (The Outlook client does not have to be running.) |
To create FaxPress users from your list of Exchange users, follow these steps:
|
1.
|
Go to Start>Programs>FaxPress>Tools>Import Microsoft Exchange Users. |
|
2.
|
In the Register FaxPress Users dialog box, enter the following information, which is required to let you log onto the FaxPress server and register users. This information is also required for the template to create the user account. |
FaxPress Server field – enter the name of the FaxPress server on which you want to register the Exchange users. If you are using TCP/IP, enter the IP address, or if in the same segment enter the FaxPress name.
User Name field – enter the FaxPress user name. The account must have Administrator privileges on the FaxPress.
In the Password field, enter the administrator’s FaxPress password.
In the Privilege Level field, click on the arrow and select the FaxPress user privilege level you want to assign to the new user accounts. Refer to the FaxPress Premier Administrator Guide and FaxPress Premier User Guide for information about privilege levels.
In the Settings based on field, enter the name of a current FaxPress user account that you want to use as a template for the new user accounts.
The name on the FaxPress account must be the user’s Exchange name.
|
3.
|
If your phone system supports some form of automatic routing (DID, DTMF, etc.) assign mailbox IDs to the new accounts by entering a starting number in the Mailbox base ID edit box, and confirming the Use automatic mailbox IDs assignment box is checked. If you do not want to assign mailbox IDs, or your phone system does not support automatic routing, leave this box unchecked. |
|
4.
|
Click on the Register button. |
|
5.
|
If the Outlook Client is not currently started, there may be a dialog box prompting for login information to the Outlook mailbox. If login is successful, the Address Book will appear. |
|
6.
|
In the Show Name from the edit box, select the Global Address list or the equivalent Outlook address book from the drop-down list. |
|
7.
|
Double-click on the Exchange users for whom you want to create new FaxPress accounts. If an account already exists, the tool informs you and does not create a new account. |
|
8.
|
Click on the OK button. The tool informs you when the accounts are successfully created. |
FaxPress Premier WebHelp
Last Updated: 11/1/2007
E-mail this page
|
Castelle
855 Jarvis Drive, Suite 100
Morgan Hill, CA 95037
Toll-free 800.289.7555
Tel 408.852.8000
Fax 408.852.8100
www.castelle.com
|


